Thursday, December 8, 2016
Saturday, December 3, 2016
Reminder to talk about on Monday
Google drive shot submission naming convention:
lowercase letter, numbers (if it's a single digit put a 0 first), if a partial number use an underscore not a period
EX: c01_5.mov
Note that google will not automatically replace something with the same name, so you have to delete the previous version when you add a new one.
It's all correct currently, and it should stay that way. With this system it is possible to automate the updating process so the most recent stuff can be implemented the most efficiently.
Grass update!
With no lighting this is the different between Chris's grass and the new one.
Also this new version renders faster and now worrying about z-depth is a thing of the past!This shader automatically figures it out for you!
I also made a quick new asset called dialroom_center_setdressing which is where the new plants are coming from. It might be good to set dress it better still, but this is a start.
So yeah, now all lighters should tab in a new "dialroom_center_landscape" I will include a quick lighting pass of it all too.
Wednesday, November 30, 2016
Tuesday, November 29, 2016
Toon Shader Ten update
Color matching from Concept paint over
My Recommendation
The problem with the highlights is they aren't as controllable as they would be with other lights...
I can talk to you more about it.
Monday, November 21, 2016
Wednesday, November 16, 2016
Check List for Lighting (General)
Courtesy of Garrett Hoyos
A few things to make sure you guys are doing:
Checklist
1. Make sure PBR is turned on (PHYSICALLY BASED RENDERING)
2. Make sure GI is on (AKA DIFFUSE LIMIT SET TO 1 bounce)
3. Motion Blur are turned on as well. (Motion Blur Checked on, Xform & Geo Time samples set to 2 for linear movements, and 5-8 for complex things like arms swinging/spinning, etc. 3 is a good default.
4. Make sure all your geo is being subdivided by defaullt. (in the geometry render subfolder of each piece of geometry check the "render poly as subd).
My process I learned from blue sky:
Light the environment first. Then the characters. If the environment doesn't look good, the characters won't have a chance. Render the environment separate from the chars.
The characters need all the focus on the head and eyes, you don't even need the environment in the character rop at all. Light it so the characters POP out of the environment. Make sure you don't leave the underside of the face go to black. It should be lifted w/ a bounce light. Eyes should be the main focus. Have a separate light for the eye spec hit.
Have 2 separate mantra rops. Env and Chars. Then have a 3rd mantra rop for character shadows (environment will have a new material on it only for accepting shadows, chars are set to phantom). The shadow render should be pretty fast in comparison since it only loads geo & 1 shader. If you need help figuring that out let me know.
Use Light blockers like circles (flat disk) or grids to direct the viewers eye to the characters eyes. Set the light blockers to phantom in the ROP. The other option is to use dappled lighting textures - set the texture map on the light w/ a map to make the lighting more varies, instead of a constant light, you get variation like what happens in real life.
I typically won't add color to my lighting until I have the values down. The values will be the true test if your lighting holds up, color only give it more life. Contrast/Value will be the key, so eliminating color at first will give your eye some room to see. Also, flipping the image horizontal or vertical is a great trick just like a painter, to reset your brain.
When I light I will do it one light at a time. Singling out the light will allow you to see what that specific light is affecting. I'll turn each one on, make sure each light is doing what I want, then turn them all on.
Monday, November 14, 2016
Sunday, November 13, 2016
Saturday, November 12, 2016
Friday, November 11, 2016
Rendering in Layers Cheat Sheet
So for everyone who came today, thanks for listening! Hopefully that made sense for everyone. Here's a link to a handy powerpoint that will help you use the dusk mantra tool. It's a little dated but it explains everything pretty well. But here's what you might want to know:
Forced Matte: Object "cut out" of the other objects behind it in the scene.
Forced Phantom: Remove object but calculate reflections/refractions/transperancy as if it were still in the scene
Exclude Object: Completely remove an object from a render
Exclude Light: Completely ignore a light in a scene
Dusk Mantra Tool PowerPoint
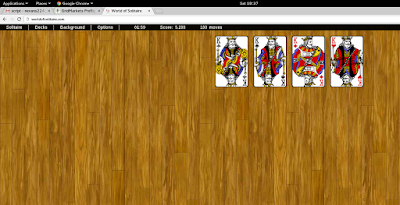
If you're rendering that means there will be some baby sitting. That's why I recommend Solitaire to all of you. Here's the time to beat on freecell: (1 min 59 sec)
Wednesday, November 9, 2016
Tuesday, November 8, 2016
Monday, November 7, 2016
Monday, October 31, 2016
Saturday, October 29, 2016
Friday, October 28, 2016
Wednesday, October 26, 2016
Tuesday, October 25, 2016
Monday, October 24, 2016
Wednesday, October 19, 2016
Monday, October 17, 2016
Thursday, October 13, 2016
Wednesday, October 12, 2016
Monday, October 10, 2016
Saturday, October 8, 2016
Ten's furniture
Some information on the furniture in Ten's room that I used to help the texture team. But I figured I should post it here too, for ease of access.
Ten's eyebrows
Hallway Update
I've updated all the hallway assets. They UVs should be ready to go as is, and I cleaned up the reference stuff in Maya. I'm not sure how the door ways will change and how those assets will integrate. So I think we should only work on assets separately in Houdini. (ex: just the tapestries or shell or statues). Then when the other stuff is finalled we can update and create the entire combined asset (which may not work well anyways, if the dial room is any example)
Let me know if you have any questions.
Thursday, October 6, 2016
Subscribe to:
Posts (Atom)


